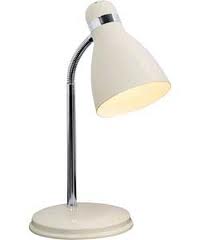
I started by creating the base, I did this by creating a cylinder, then flattening it and and bevelling the edges.
To create the stem, I first used curves to draw shape of it.
I then drew a circle, and extruded the circle around the shape of the stem.
The shape didn't quite turn out how I wanted it, so I made another few attempts at it and ended up with one I liked.
I extruded the bottom edges of the stem because in the picture it isn't straight all the way down.
Since this isn't a very detailed lamp, I decided to include the power plug and switch to it. I started by creating the cable in the same way I created the stem.
For the power switch, I created a rectangle, added in an edge loop through the middle so that I could pull in the center a bit, and bevelled the edges. It was a similar process with the switch itself. Basically it's the same except the bevels are closer together, and the center loop has been pulled further in.
In order to make the switch look more real, before making the actual switch bit, I created a rectangle, and used booleans to make a hole in the main body of the switch. It was then just a simple case of placing the switch into the main body and sizing it up so that it fits properly, but leaves a small sceme around the edges.
That then gave me the idea of making the switch's main body look like it was separate parts screwed together. So I created another edge loop around the center, really close to the one that was already there, turned it to face mode, and extruded the faces in by a fraction.
That's all I have for now, in my next post I will show you how I went on to make the plug, and the lamp shade and bulb parts, along with the minor details in each.


No comments:
Post a Comment