The first five (out of ten) 3D models that I have to make are due in on the 14th December. They do not have to be lit or textured, but they do have to be done to a high quality.
Model 1: A cordless drill with the drill bit (Modern)
First Thoughts: Should be fairly simple, depending on what design I choose, but it should just be a few extruded cubes to create the actual tool itself. Tricky parts wil include the handle/grip (must be moulded to fit a persons grip, not quite sure how I'm going to do that yet), the drill piece itself and the moving cylinder that the drill piece is attached too (all around this piece is tiny grooves, which shouldn't be difficult to do, but it may be tome consuming).
Model 2: Steam iron (Modern)
First Thoughts: Again the general shape should be fairly simple and choosing a design will be easy because pretty much all irons look the same. Difficult bits will be the grated metal plate, and the power cable.
Model 3: Patio table with umbrella (any era)
First Thoughts: Many different designs to choose from, I am edging towards doing a wooden patio table, purely because I think if done right, it will look so much better than a plastic, one piece table. Difficulties will be the umbrella shape (actually it probably won't be too difficult) and putting holes in certain planks of wood for screws (for detail).
Model 4: Desk Lamp (any era)
First Thoughts: I can either make this really easy, or really difficult. I am going to go for a nice simple design, better to do something easy well, or something complicated badly. Difficulties will be the power cable and the bulb, the rest should be simple.
Model 5: Games console (any era)
First Thoughts: Lots of choice! I don't want to go for anything too easy, like a Game Cube for example, but I also don't want to get ahead of myself. I am edging towards doing a Playstation 1 Curve, which was the first games console I owned. I has a nice rectangular curve shape, with a flip open disk tray.
Plan Of Action: I am starting with the easiest, and working through them in order of difficulty, beginning with the lamp. I will collect various different source images, and choose from there which design I want to go for. I plan top do one model a week, which gives me more than enough time to get each one done to a decent quality, with time to spare to fix anything I don't like. After the lamp I will move onto the cordless drill, then the steam iron, followed by the games console and finally the patio table.
Tuesday, 23 October 2012

Saturday, 13 October 2012
Modelling A Spanner
For my next attempt, I am going to try and model a spanner. Using these pictures as reference:


 Some obvious challenges with this piece are:
1. That it has a hole at the bottom of the handle.
2. It has a separate moving part at the top.
3. The coiled section at the top.
I start by created a rectangle and a torus. I went on to add more subdivisional divides to the rectangle, and smoothing it off with the 5 key short cut. I then extruded the edges of the rectangle so that I could aline the torus.


 To start created the fin-like section at the top, I created a cube, added some subdivisional width to it, and began moving the edges to try and get that curved shape and then I duplicated it, rotated it, and shank it.

 To give the tool part of the spanner a more natural look, I grabbed the top section that is curved and dragged it to cover more of the surface area.

 Then I create a torus, thinned it out, and placed it onto the cylinder. Simply duplicating it to create the rest of the rings.

 Here's the finished product:
 I am quite proud of this one, particularly the handle and the twisted section, but there are things that I wold definitely like to improve on:
1. I would like to make certain areas look smoother, there's a clear divide between certain areas.
 2. I would try and use less separate shapes to make the top section.
3. Try and tidy up the edges between the shapes better.


1. That it has a hole at the bottom of the handle.
2. It has a separate moving part at the top.
3. The coiled section at the top.
I start by created a rectangle and a torus. I went on to add more subdivisional divides to the rectangle, and smoothing it off with the 5 key short cut. I then extruded the edges of the rectangle so that I could aline the torus.
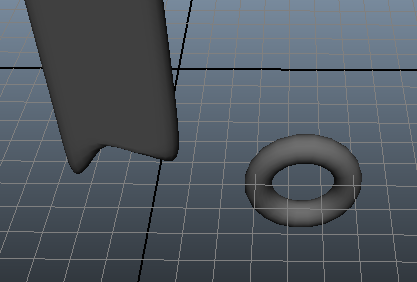

I then started working on the actual tool part of the spanner. I struggled with the idea of putting a hole in a square in order to put


To create the twisted bit in the center, I started with making a cylinder and placing it in the gap.


1. I would like to make certain areas look smoother, there's a clear divide between certain areas.

3. Try and tidy up the edges between the shapes better.
Thursday, 11 October 2012
Modelling A Hammer
In class I made an attempt at modelling a hammer in Maya.
I worked from the picture below:
 This is how it turned out:


 One of the problems I have when modelling the hammer was that somehow I ended up with a dint in it when I extruded one of the edges:

I plan to fix this small fault and then just generally neaten up the model. I will mostly look at modifying the handle.
I worked from the picture below:


I plan to fix this small fault and then just generally neaten up the model. I will mostly look at modifying the handle.
Sunday, 30 September 2012
Continued Work On The One Ring
As you saw in my last post, I attempted to make The One Ring from The Lord Of The Rings movies, well today I continued my attempt.
 As you can see I have tried to give the ring an elvish quality by adding the material 'phong' and adjusting its qualities. The ring on the left is the purely the polygon shape and the ring on the right is the adjusted one. Clearly it doesn't look right, it is too translucent.
So I started again. Gave the new ring the same material and had a second attempt at colouring. At least this time it didn't end up red.
 It is clear that this is much closer to the colour that I want. I went on to tweak the texture and give it a much more orange look without losing the gold.
 This is much more like the look I'm going for.
Once I get the look right, I will open a picture of the inscription in photoshop, mess about and tweak that slightly, then import it into Maya, wrap it around the ring and parent the two of them together.
Finally I will add in light, shadow and reflection and hopefully it'll be finished.
I'll keep you posted.

So I started again. Gave the new ring the same material and had a second attempt at colouring. At least this time it didn't end up red.
Once I get the look right, I will open a picture of the inscription in photoshop, mess about and tweak that slightly, then import it into Maya, wrap it around the ring and parent the two of them together.
Finally I will add in light, shadow and reflection and hopefully it'll be finished.
I'll keep you posted.
Wednesday, 26 September 2012
First Attempt At Adding Colour
Whilst watching Lord of the Rings The Two Towers I decided i would take a shot at modelling the one ring. I know it looks nothing like it, but I just thought i would fiddle about and get the general shape, and mess about with some texturing.
 This is a very quick attempt, I've been messing around all night with different designs.
As you can see I've got the shape of the ring right, but not quite the colour.
Over the next few days I will keep trying different things, starting with the colour and reflection.
By next week I want it to have the inscription on it.
As you can see I've got the shape of the ring right, but not quite the colour.
Over the next few days I will keep trying different things, starting with the colour and reflection.
By next week I want it to have the inscription on it.
Sunday, 23 September 2012
First Attempt At A 3D Model Train
This is my first attempt at building a 3D Model Train in Maya 2013.
 As you can see I accidentally made the cart lower down that the train. Something I didn't realise until uploading the screen shot.
Here's a few more screen shots from different angles.


This is a bit I'm quite proud of, it is the connection between the train and the cart.


It didn't go as planned.

Here's a few more screen shots from different angles.


It doesn't look like much, but I found it incredibly tricky and fiddly to manoeuvre the small parts.
If I were to do this model again, I'd probably make sure that the train and cart are level, and then I would go on to adding more detail to the train. An early attempt at making the chimney hollow is below:
Subscribe to:
Posts (Atom)